Creamy Oreo Cheesecake Recipe

6/23/2026
I may earn commissions on purchases through links in this post. As an Amazon Associate I earn from qualifying purchases. Please read our disclosure policy.
This oreo cheesecake is one of those recipes that makes people stop mid-bite and ask, “Wait, you made this?” It’s a creamy, dreamy, baked cheesecake with a buttery Oreo cookie crust, chunks of Oreo stirred right into the velvety filling, and absolutely no fussy water bath required. If you’re looking for the best oreo cheesecake recipe to add to your dessert rotation, this is the one.
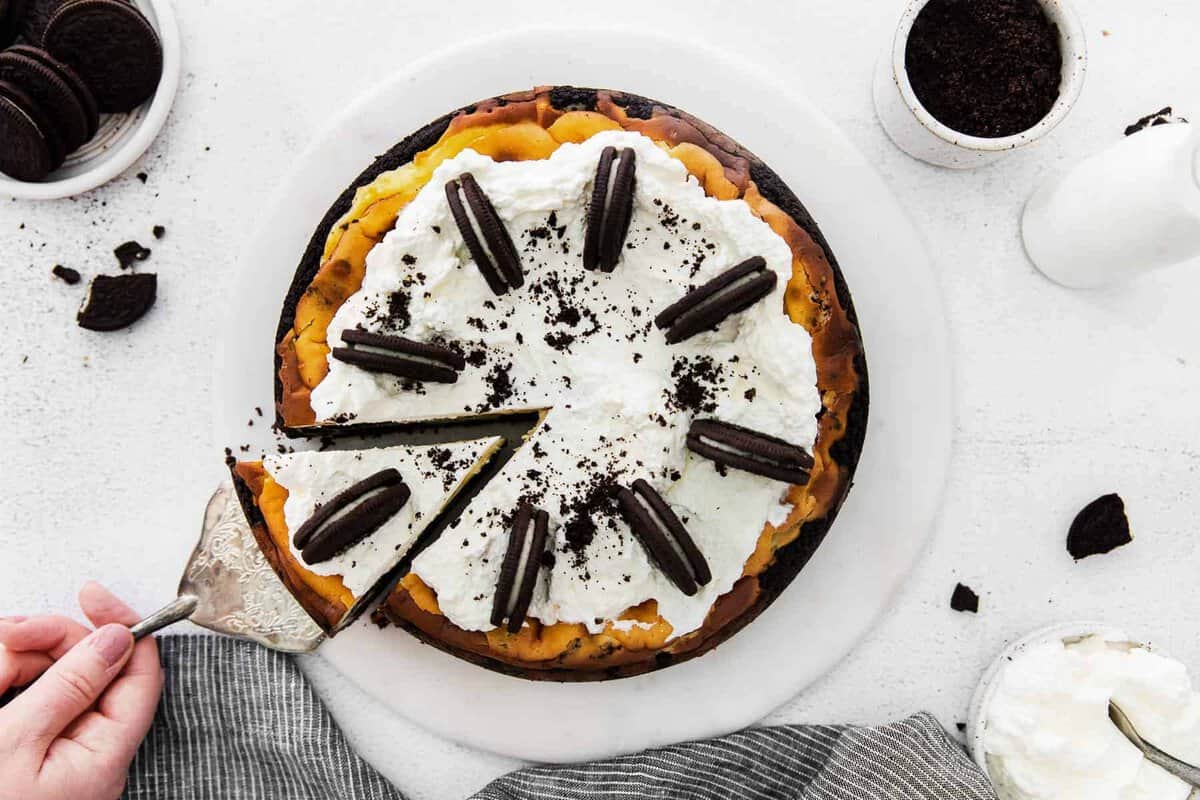
This creamy baked oreo cheesecake is loaded with cookies-and-cream flavor in every layer — from the buttery Oreo cookie crust to the chunks of Oreo stirred into the velvety filling. No fussy water bath needed. It’s rich, tangy-sweet, and impossibly smooth, with a simple make-ahead timeline that makes it perfect for holidays, birthdays, or any excuse to eat cheesecake.
Why I’m Obsessed
- Cookies & cream in every bite: Oreo crust on the bottom AND chunks of cookie throughout the creamy filling — double the Oreo action in every single slice.
- No water bath required: Skip the fussy foil-wrapping and roasting pans full of water. A gentle baking approach and proper cooling keeps this oreo cheesecake crack-free without the hassle.
- Make-ahead friendly: This cheesecake actually needs overnight chilling, so it’s a dream for entertaining — bake it a day ahead and forget about it until dessert.
- Simple ingredient list: Cream cheese, sugar, eggs, Oreos, butter, and a few pantry basics. No specialty ingredients, no complicated techniques — just a really, really good cheesecake.
What You’ll Need
This oreo cheesecake recipe uses simple, straightforward ingredients you can find at any grocery store. I’ll break them down by section — the crust and the filling — with a few notes on what to look for and where substitutions work (and where they don’t).
For the Oreo Crust
- Oreo cookies: Use standard Oreos (not Double Stuf — the extra cream filling adds too much oil and can make the crust greasy). Pulse whole cookies with the filling in a food processor until they’re the texture of sand. No need to scrape out the cream first.
- Unsalted butter: Melted. The butter binds the crumbs into a firm, sliceable crust that holds together beautifully when you cut into it. Don’t skip it! This same Oreo crust technique works beautifully across all kinds of cheesecake recipes, too.
For the Cheesecake Filling
- Cream cheese: Full-fat, brick-style only — not the tub spread. It must be at room temperature for a smooth, lump-free batter. If yours is still cold, check out my post on how to soften cream cheese for four quick methods.
- Granulated sugar: White sugar works best here. I don’t recommend swapping it for brown sugar or any other sweetener — it changes the texture and flavor of the filling.
- Whole milk: The whole milk helps give this cheesecake a super creamy texture. Don’t substitute with skim — you’ll lose that luxurious mouthfeel.
- Eggs: Eggs act as the binder and give cheesecake its classic creamy-dense texture. They’re absolutely essential, so don’t leave them out. You’ll add them one at a time on low speed — more on that below.
- Pure vanilla extract: A little goes a long way. It enhances the sweet, cookie-forward flavor without overpowering the cream cheese.
- Crushed Oreos: Smash each cookie into 3–4 chunks for bite-sized cookie pieces throughout the filling. Don’t over-crush them — you want visible Oreo pieces, not dust.
How to Make Oreo Cheesecake
This oreo cheesecake uses a simple homemade Oreo crust and traditional cheesecake filling ingredients jazzed up with cookies throughout. Here’s a walk-through of the process with tips to help you nail it on the first try.
Make the Oreo Crust
Preheat your oven to 350°F and grease a 9″ springform pan with nonstick baking spray. Stir together the Oreo crumbs and melted butter until combined, then transfer the mixture to the prepared pan and press it firmly into the bottom to create an even, compact layer. Pro tip: use the flat bottom of a glass or measuring cup to get it really even and tight — a loose crust won’t hold up as well once you slice into it. Bake the crust for about 5 minutes, then set it aside to cool slightly while you make the filling.
Prepare the Cheesecake Filling
In the bowl of a stand mixer fitted with the paddle attachment, beat the room-temperature cream cheese on medium speed until it’s smooth and creamy — about 30 seconds. Then add the sugar, milk, and vanilla and mix until combined. Make sure to scrape down the sides and bottom of the bowl here — nobody wants lumpy cheesecake. One important note: after the cream cheese is smooth, keep everything on low speed. Overmixing at this stage incorporates excess air into the batter, which causes the cheesecake to puff up in the oven and then crack as it cools. Low and slow is the name of the game.
Mix in the Eggs
With the mixer still on low/slow speed, add the eggs one at a time, allowing each egg to fully incorporate before adding the next. Scrape down the sides of the bowl between additions. I always do a final scrape of the very bottom of the bowl after the last egg goes in — there’s almost always a sneaky pocket of cream cheese hiding down there, and catching it now saves you from a lumpy surprise later.
Fold in the Oreo Pieces
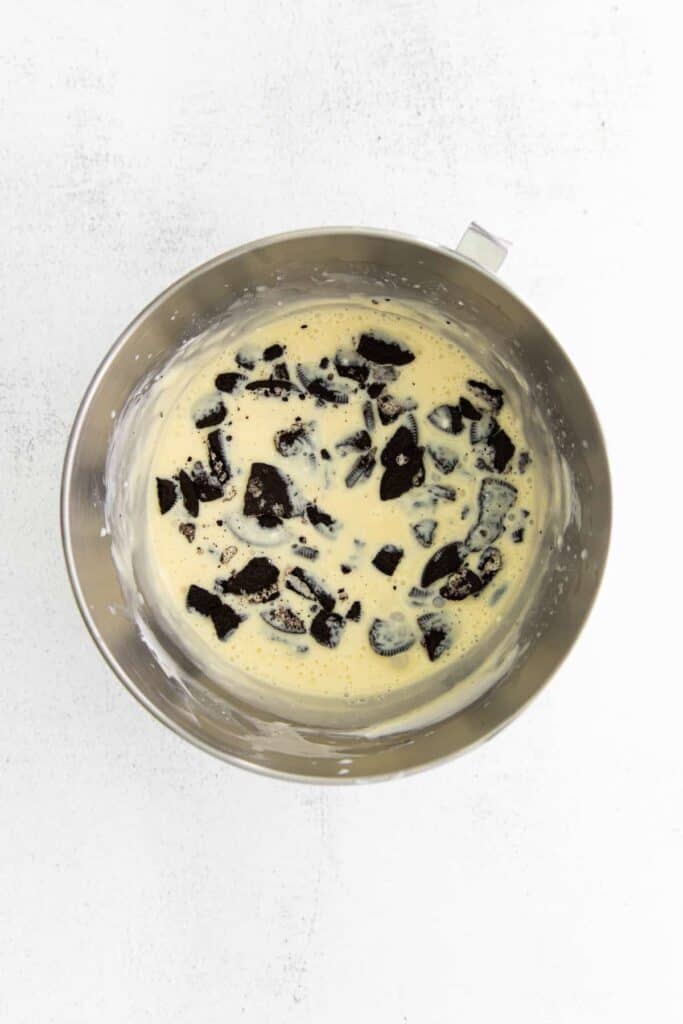
Gently fold the crushed Oreos into the batter with a spatula — not with the mixer. You want to keep those pieces chunky (about 3–4 pieces per cookie) so you get that satisfying cookie bite in every slice. If you want an even more dramatic Oreo moment, try layering a handful of quartered Oreos across the middle of the batter as you pour it into the pan — you’ll get a beautiful cookie ribbon through the center of every slice.
Bake and Chill
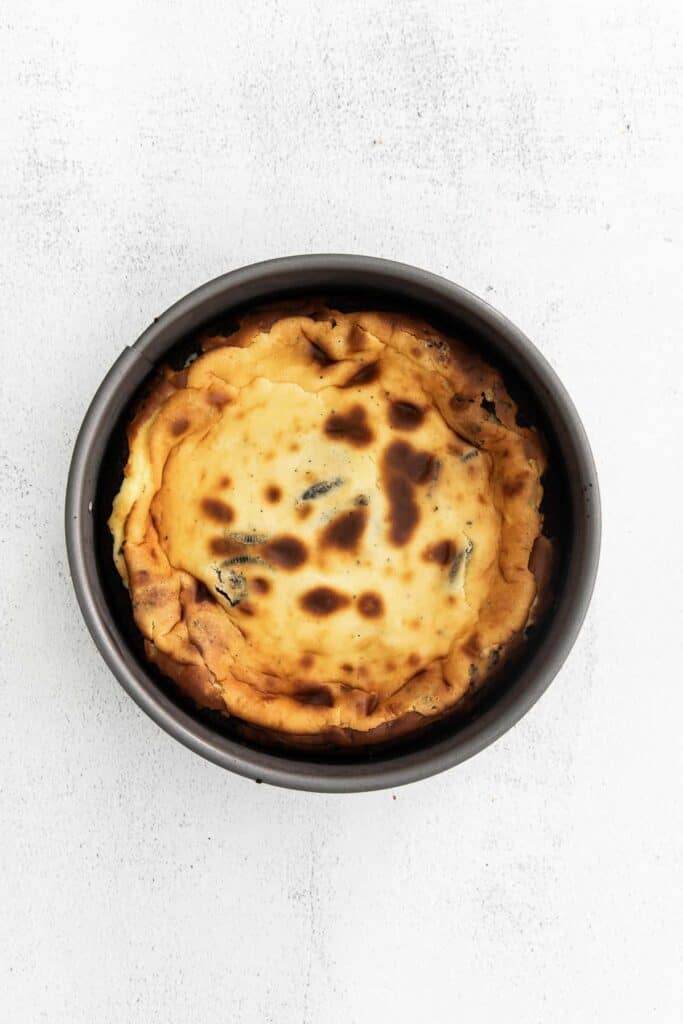
Pour the batter over the crust and bake at 350°F for 55–60 minutes. The cheesecake is done when the edges are golden brown and set, but the center (about a 2-inch circle) still jiggles slightly when you gently shake the pan — like set Jello, not liquidy. If you want extra insurance, an instant-read thermometer should read about 150°F in the center.
As soon as the cheesecake comes out of the oven, run a thin knife around the edge of the pan. This lets the filling shrink freely as it cools instead of pulling against the sides and cracking. Let the cheesecake cool to room temperature on the counter, then transfer it to the fridge for at least 4 hours — but overnight is ideal for the best texture and cleanest slices. If you love a hands-off approach, try my Instant Pot cheesecake — same creamy result, even easier method.
Tips for Success
- Bring everything to room temperature: Set out cream cheese, eggs, and milk at least 1 hour before starting. Cold ingredients lead to a lumpy batter and uneven baking.
- Don’t overmix the batter: After the cream cheese is smooth, keep the mixer on low. Overbeating incorporates air that causes the cheesecake to rise in the oven, then collapse and crack as it cools.
- Scrape the bowl — a lot: After every major addition (sugar, each egg), scrape the sides and bottom of the bowl. Unincorporated cream cheese = lumps in your finished cheesecake.
- Know when it’s done: The center should jiggle like set Jello, not slosh. The edges will be slightly puffed and golden. An instant-read thermometer should read about 150°F in the center.
- Prevent cracking: Run a thin knife around the edge of the cheesecake as soon as it comes out of the oven. This lets the filling shrink freely instead of pulling against the pan. Don’t rush cooling — let it come to room temp on the counter before refrigerating.
- Clean slices: Dip a sharp knife in hot water and wipe it dry between each cut for bakery-perfect slices every time.
- If it cracks anyway: Don’t panic — a layer of whipped cream or chocolate ganache hides all sins. Nobody’s ever sent back a slice of cheesecake because of cosmetic damage.
For a cheesecake that walks through every step with even more detail, check out my classic cheesecake recipe.
Variations to Try
- Mini Oreo cheesecakes: Use a muffin tin lined with cupcake liners. Press a small spoonful of crust into each, fill with batter, and bake for about 20–22 minutes. Perfect for parties where you want individual portions.
- Oreo cheesecake bars: Press the crust into a 9×13 pan, pour in the batter, and bake. Cut into squares for easy serving — great for potlucks and bake sales.
- Cookie-layered cheesecake: Pour about a third of the batter in, layer quartered Oreos across the surface, then pour the remaining batter on top. You’ll get a beautiful cookie ribbon through the center of every slice.
- Golden Oreo cheesecake: Swap classic Oreos for Golden Oreos in both the crust and filling for a vanilla-forward, lighter-colored cheesecake that’s just as irresistible.
- Chocolate ganache-topped: Drizzle warm chocolate ganache over the chilled cheesecake before adding whipped cream — it takes the whole thing over the top. Browse more of my favorite dessert recipes for more topping inspiration.
Love cookies and cream flavor in other forms? Try my cookies and cream cupcakes for a lighter, more portable version.
Topping Ideas
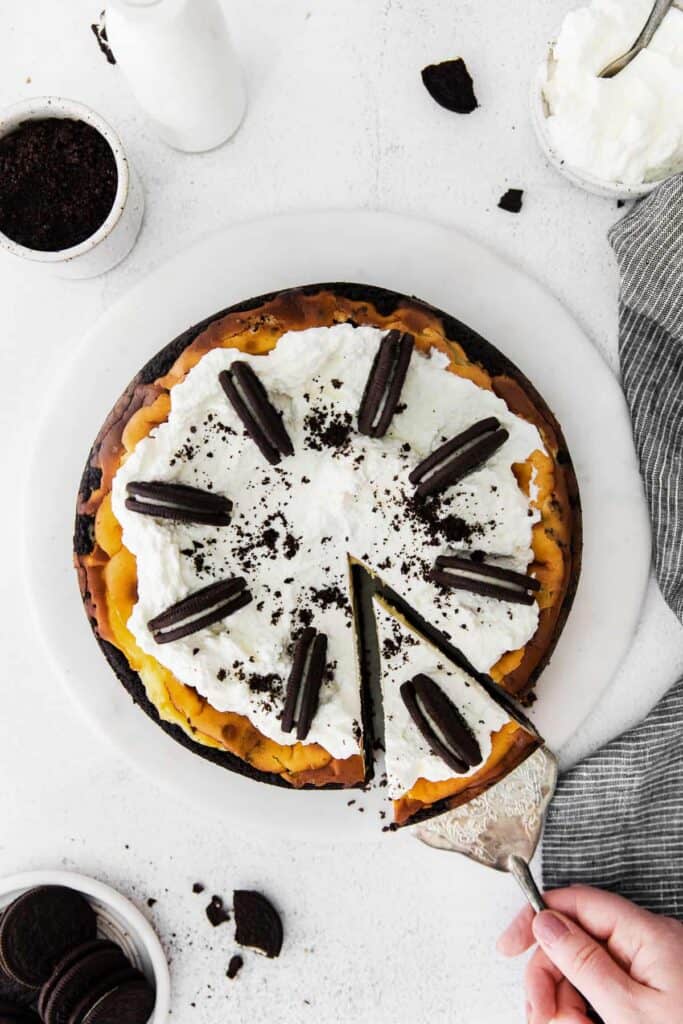
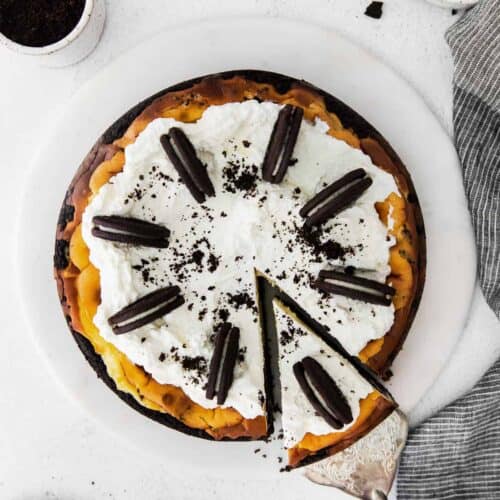
- Whipped cream + whole Oreos: Spread a thin layer of whipped cream (or Cool Whip for a sturdier texture) and stand whole Oreos vertically around the edge so each slice gets one.
- Chocolate ganache: Warm equal parts chocolate chips and heavy cream, whisk until smooth, and pour over the chilled cheesecake for a glossy, rich finish.
- Cookies & cream whipped cream: Fold finely crushed Oreo crumbs into fresh whipped cream for double the cookie flavor in every dollop.
- Chocolate or caramel drizzle: A quick zigzag of chocolate syrup or caramel sauce makes every slice look bakery-worthy with minimal effort.
- Fresh berries: Strawberries, raspberries, or blueberries add a fresh pop of color and acidity that cuts through the richness beautifully.
- Crushed Oreo dust: Pulse a few Oreos into fine crumbs and sprinkle over the top for a finishing touch.
For a cheesecake that comes with its own caramel topping built in, check out my salted caramel cheesecake.

Storing & Freezing
Refrigerator: Cover the oreo cheesecake with plastic wrap right in the springform pan (or transfer to an airtight container) and store in the fridge for up to 5–7 days. The flavor actually improves after a day or two as everything melds together.
Freezer: Let the cheesecake cool completely, then wrap tightly in plastic wrap and a layer of aluminum foil. Freeze for up to 3 months. You can freeze the whole cheesecake or individual slices — wrap each slice separately for easy grab-and-go portions. Thaw overnight in the refrigerator before serving, and add toppings after thawing.
If you’re stocking the freezer with cheesecakes, my mascarpone cheesecake and ricotta cheesecake both freeze beautifully too.

FAQs
Yes! This recipe doesn’t require a water bath at all. The key to a crack-free cheesecake is using room-temperature ingredients, not overmixing the batter, and allowing the cheesecake to cool gradually — first to room temperature on the counter, then in the fridge.
Cracks usually happen from overmixing (too much air in the batter), using cold ingredients, opening the oven frequently, or cooling too quickly. If it does crack, don’t stress — a layer of whipped cream or chocolate ganache covers it perfectly.
I’d recommend sticking with regular Oreos. The extra cream filling in Double Stuf adds too much oil and sugar, which can make the crust greasy and the filling overly sweet. If you want to use them, regular Oreos for the crust and Double Stuf for the chunks inside is a good compromise.
The edges should be set and slightly golden, and the center (about a 2-inch circle) should jiggle like set Jello when you gently shake the pan. It should not look wet or liquidy. An instant-read thermometer should read about 150°F in the center.
Absolutely — in fact, it’s better that way. This cheesecake needs at least 4 hours in the fridge to set, and overnight is ideal. You can bake it up to 2 days before serving. Add toppings right before you’re ready to serve.
Pre-baking the crust for about 5 minutes before adding the filling sets the butter and creates a firmer base. Also, make sure you’re pressing the crumbs firmly and evenly — a loose crust won’t hold up as well. Using the flat bottom of a glass or measuring cup helps create a solid, even layer.
More Cheesecake Recipes You’ll Love
- Slutty Cheesecake Bars
- Triple Chocolate Cheesecake
- Churro Cheesecake
- The Best Creamy Homemade Cheesecake
I may earn commissions on purchases through links in this post. As an Amazon Associate I earn from qualifying purchases. Please read our disclosure policy.
Oreo Cheesecake Recipe
Ingredients
For the Crust
- 3 cups oreo crumbs
- 1/2 cup unsalted butter, melted
For the Cheesecake
- 24 oz. cream cheese, softened
- 1 cup granulated sugar
- 1/2 cup whole milk
- 1 teaspoon pure vanilla extract
- 4 large eggs
- 1 cup crushed oreos
Instructions
For the Crust
- Preheat your oven to 350°F and grease a 9” springform pan with nonstick baking spray.
- In a small bowl, stir together the Oreo crumbs and melted butter until combined.
- Transfer the crumbs to the prepared springform pan and press them into the bottom creating an even, compact layer.
- Bake for 5 minutes.
- Remove the crust from the oven and set it aside to cool slightly while you make the cheesecake filling.
For the Cheesecake
- In the bowl of a stand mixer fitted with the paddle attachment, beat the cream cheese on medium speed until it is smooth and creamy— about 30 seconds.
- Add the sugar, milk, and vanilla, and mix until combined— about 30 seconds.
- With the mixer on slow speed, add the eggs one at a time, allowing each egg to incorporate fully before adding the next one.
- Make sure to scrape down the sides of the bowl a few times while mixing to fully incorporate the cream cheese— you don’t want lumpy cheesecake!
- Add the crushed Oreos and fold them gently into the cheesecake batter.
- Pour the batter over the crust and bake for 55-60 minutes or until the cheesecake is golden brown around the edges and set in the center. When fully baked, it should jiggle slightly but not look wet when shaken.
- Remove the cheesecake from the oven and allow it to cool to room temperature. Then transfer it to the fridge and allow it to cool for at least four hours, preferably overnight.
- Slice and enjoy. Store any leftover cheesecake in an airtight container in the fridge for up to three days.
Watch It
Nutrition
Nutrition information is automatically calculated, so should only be used as an approximation.
Don’t forget to tag your posts on social media with the hashtag #cheeseknees, we’d love to see what you’re up to!